
A packaging dieline is the technical template that positions every panel, fold, cut and glue area. Print-ready artwork applies approved design and copy to that template using the printer’s specifications, with prepress checks completed before production.
You approve the artwork on a Friday. The file looks sharp on screen, your designer has signed off, and the printer has the PDF. Three weeks later the boxes arrive. The barcode runs across a fold, the logo sits too close to the cut edge, and the gold foil lands a few millimetres off the lettering it was meant to sit on.
Reprints on custom packaging are expensive, and most of them trace back to one place: the artwork file and the dieline it was built on. Founders rarely see this stage up close, yet it is where your packaging decisions get locked in.
Understanding the broader cosmetic packaging design process will help you see how these technical files fit into your overall launch timeline. This guide explains what a dieline is, what print ready artwork contains, how to check files before they reach the printer, and where approval risk sits. It is written for beauty founders who want to go into production with confidence.
What Is a Packaging Dieline?
A dieline is a flat, scaled template that shows the shape of a package before it is cut, folded and glued. It marks where the cutting tool trims the board, where the box folds and where glue is applied. Your artwork is built on top of it, so every logo, panel and line of text sits where the structure can support it.
For a skincare carton, the dieline shows the front, back and side panels, the top and bottom closures and the glue flap, all laid out as one flat shape. For a bottle label, it shows the exact label size, corner radius and wrap area.
Who creates the dieline?
Your packaging manufacturer usually supplies it, built to the exact board, dimensions and structure you have ordered. Your designer then builds the artwork on that file. A generic template from the internet is where problems start, because small differences in board thickness and fold depth change how panels line up.
What Counts as Print Ready Packaging Artwork?
Print ready artwork is a final file a printer can send to production without changes. It has the correct dieline applied, bleed added, text converted to outlines, images at full resolution and colours set up for the way the job will be printed. If the printer has to fix anything, the file was not ready.
These are the terms you will hear most often when files move between designer, printer and founder.
| Term | What It Means | Why It Matters |
|---|---|---|
| Dieline | Flat template showing cut, fold and glue lines | Every element of the artwork is positioned against it |
| Trim Line | The line where the box is cut | Defines the final size of the pack |
| Bleed | Artwork that extends past the trim line, usually 3mm | Prevents white edges if the cut shifts slightly |
| Safe Zone | Inner margin where text and logos must stay | Keeps key elements from being trimmed or folded |
| Fold Line | The line where the board bends | Text and barcodes crossing it will distort |
| Glue Area | A panel left free of ink and coating for adhesive | Print on it and the box may not seal |
| Spot Colour | A premixed ink such as a Pantone shade | Gives precise brand colour and metallic effects |
| Overprint | An ink setting that prints one colour over another | A wrong setting changes colours or drops elements |
| Preflight | An automated and manual file check before print | Catches errors while they are cheap to fix |
Where to Get the Right Dieline for Your Packaging
Ask your manufacturer for the dieline once you have confirmed the structure, board and dimensions. It should arrive as a vector PDF or Illustrator file with each line type on its own labelled layer. Check the version number and date, since a revised structure means a revised dieline.
If you are working with a custom structure, the manufacturer's structural team can build one from your product measurements. Give them accurate dimensions, including the filled container and any insert, so the pack fits the product in your hand and not only the product on paper. Before committing to a full run, it is highly recommended to learn the differences between a packaging prototype vs mockup vs production sample so you know exactly what kind of physical test you are approving.
Keep the original supplier file untouched. Your designer should work on a copy, which lets you check the artwork against the source at any point.
How to Set Up Bleed, Safe Zones and Fold Lines
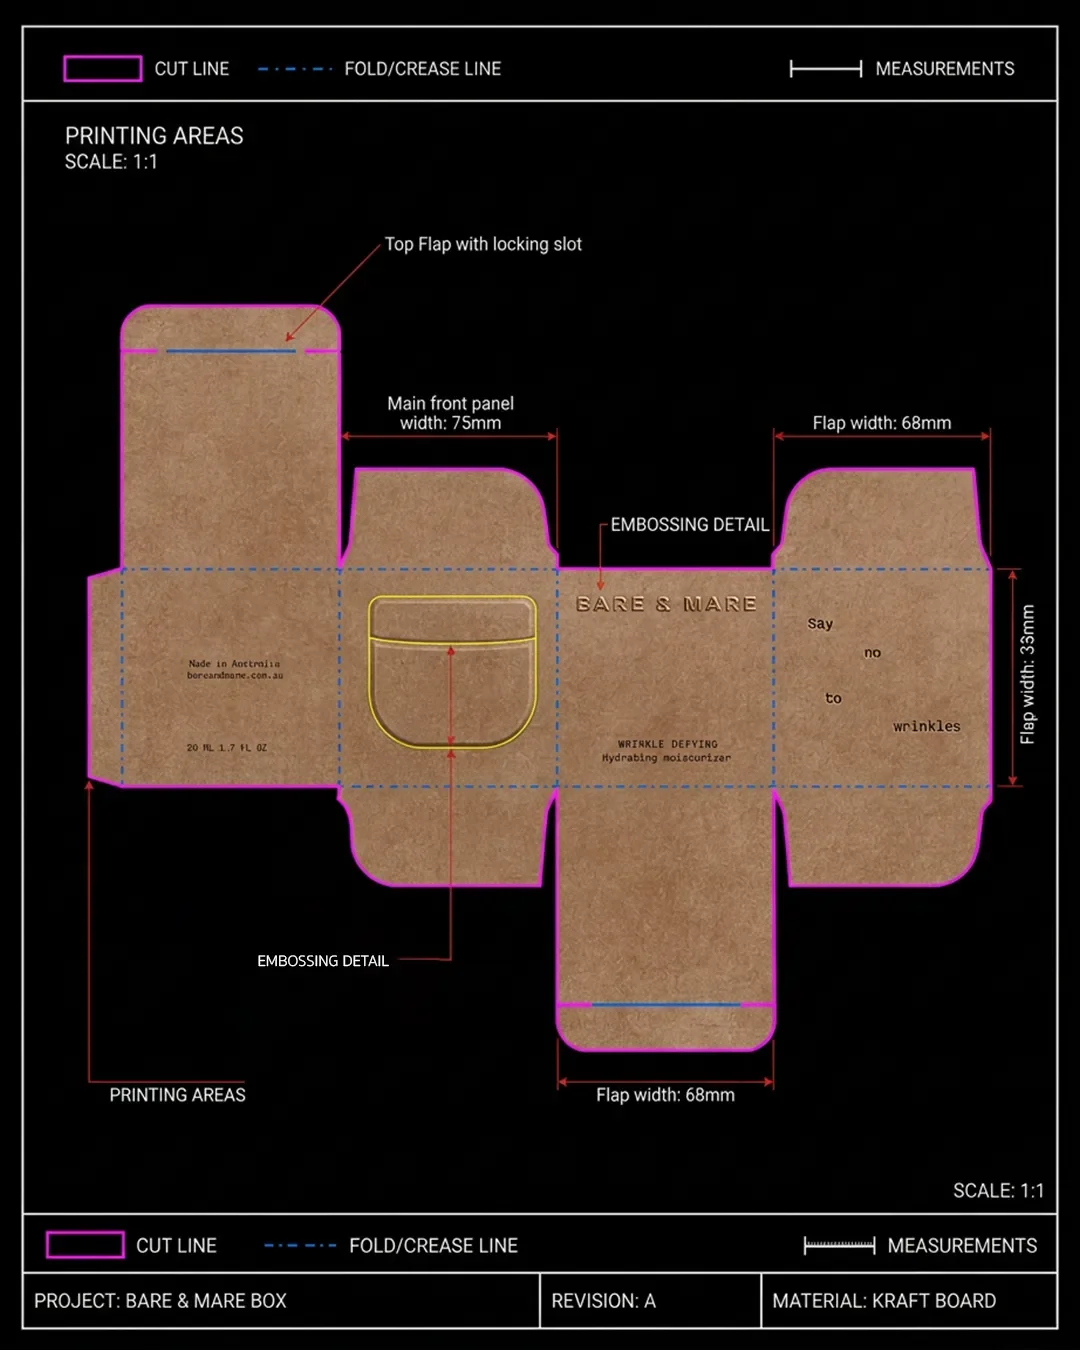
Extend background colour and imagery 3mm past the trim line, keep text and logos at least 3mm inside it, and keep important elements away from fold lines. Some printers ask for 5mm inside the trim. Your printer's stated tolerances override any general rule.
How much bleed does packaging need?
Most printers ask for 3mm of bleed on every side. Large format and rigid box work can need more, so confirm the figure before the artwork is built.
Use this key when you review an annotated dieline. Each marking has a job.
| Marking | What It Shows | What to Check |
|---|---|---|
| Cut or trim line, usually a solid line | The final edge of the pack | Background colour extends beyond it |
| Fold line, usually a dashed line | Where the board bends | No text, barcode or fine detail crosses it |
| Bleed area, outside the trim line | The part that is trimmed away | Colour and imagery reach this edge |
| Safe zone, inside the trim line | The margin for important content | Logo and text sit inside it |
| Glue flap | The area adhered to close the box | Free of ink, foil and varnish |
| Panel labels | Front, back, sides, top and bottom | Artwork faces the right way on every panel |
| Finish areas | Where foil, emboss or spot UV land | Finish layers line up with the artwork beneath |
Ask your designer to send an annotated version of your dieline with these markings labelled. It lets you review placement before anything is printed.
Panels that wrap around a corner need extra care. A logo that sits across the front and side of a carton shifts with even a 1mm fold variation, so keep it on a single panel unless the wrap is intended and the printer has confirmed the tolerance.
Colour, Foil and Finish Layers in Your Artwork File
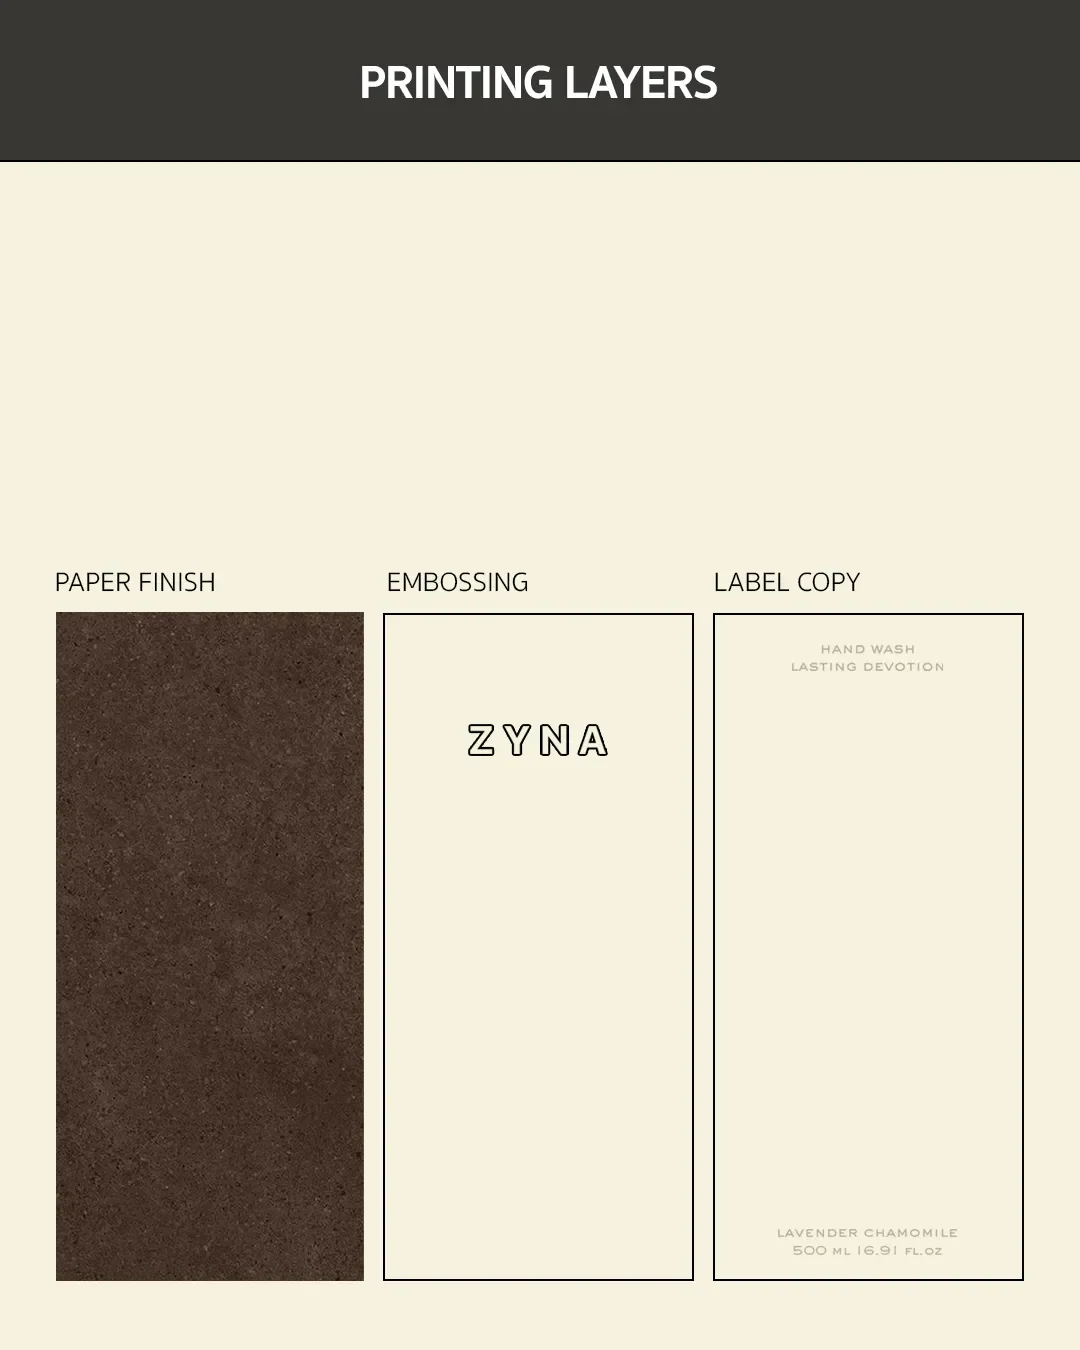
Special finishes are built as separate layers or spot colour channels in the file. Foil, embossing, debossing and spot UV each need their own layer sitting exactly over the artwork they affect. The printer reads these layers to make tooling, so a missing or misaligned layer means a missing or misplaced finish.
Set finish layers as 100 percent black or a named spot colour, and label them clearly, for example Foil Gold, Emboss and Spot UV. Keep fine detail on foil above the minimum line weight your printer specifies, because thin lines fill in during stamping.
Colour mode matters too. Standard print jobs use CMYK, and brand colours that must match closely use Pantone spot inks. Screens display RGB, which is why a colour can look different on the box than on a monitor. Our guide to colour matching in packaging covers Pantone and CMYK in detail.
Barcodes, Regulatory Text and Claims on Beauty Packaging
Beauty packaging carries more required text than most categories, and all of it has to fit inside the dieline. Depending on your market, a pack can need an ingredient list, net content, batch code area, period after opening symbol, responsible person address, warnings and a barcode. Requirements differ between the UK, EU, US and Australia, so confirm yours with your regulatory advisor before artwork is finalised.
Give the barcode a flat panel with a clear white margin, and keep it away from folds, seams and embossed areas. Scanners read contrast, so a barcode over a textured or dark area can fail at the till. Leave a smooth blank patch for batch and expiry coding too, since many codes are inkjet printed after production.
Check minimum type size on the ingredient list. Small text on a curved or narrow panel is one of the most common reasons a pack needs reworking.
File Formats, Fonts and Image Resolution for Packaging Print
Most printers want a print PDF, often PDF/X4 or PDF/X1a, with fonts outlined or embedded and images at 300 ppi at final size. Send what your printer specifies, since requirements vary by supplier.
| Item | What Printers Usually Expect | Common Error |
|---|---|---|
| File Type | Print PDF, plus the native design file if asked | A screen quality PDF sent as final |
| Fonts | Converted to outlines or embedded | A missing font replaced with a default |
| Images | 300 ppi at final size | Low resolution images stretched in the layout |
| Logos and Line Art | Vector files | A logo pasted in as a small JPEG |
| Colour | CMYK and named spot colours | RGB files converted at the last minute |
| Layers | Dieline, artwork and finishes on separate named layers | The dieline left visible and printed on the pack |
| Links | Images embedded in the file | Linked images missing at export |
Print Ready Artwork Checklist for Founders
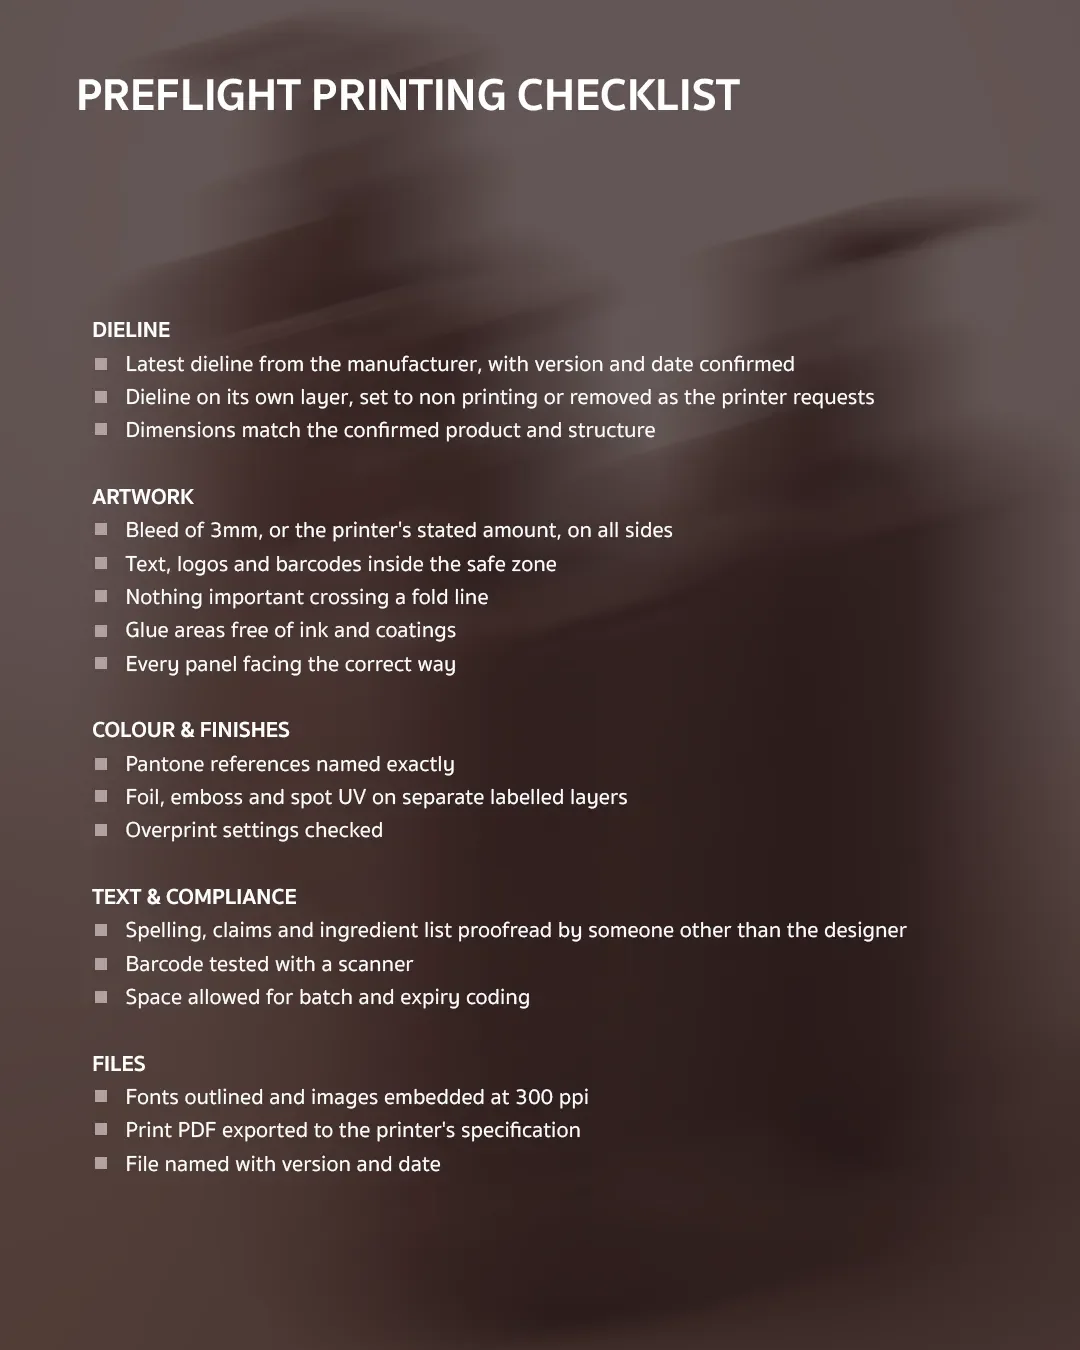
Hand this preflight checklist to your designer before files go to the printer, and ask for confirmation of each item in writing.
Dieline
Latest dieline from the manufacturer, with version and date confirmed
Dieline on its own layer, set to non printing or removed as the printer requests
Dimensions match the confirmed product and structure
Artwork
Bleed of 3mm, or the printer's stated amount, on all sides
Text, logos and barcodes inside the safe zone
Nothing important crossing a fold line
Glue areas free of ink and coatings
Every panel facing the correct way
Colour and finishes
Pantone references named exactly
Foil, emboss and spot UV on separate labelled layers
Overprint settings checked
Text and compliance
Spelling, claims and ingredient list proofread by someone other than the designer
Barcode tested with a scanner
Space allowed for batch and expiry coding
Files
Fonts outlined and images embedded at 300 ppi
Print PDF exported to the printer's specification
File named with version and date
How Printers Check Artwork Before Production
A printer runs preflight first, an automated check for issues such as missing fonts, low resolution images and wrong colour modes. You then receive a proof to approve. A digital proof, usually a PDF, shows layout, placement and text. A flat printed proof shows how colours and finishes look on the chosen stock.
Preflight checks the technical setup of the file. Spelling, claims and placement are yours to check.
What should you check on a proof?
Read every word on every panel, confirm the panel order, check the barcode position, look at where folds fall against text and logos, and compare colours with your reference. Check finish placement against the dieline. Then approve in writing with the version named.
Who Is Responsible for Artwork Errors: Founder, Designer or Manufacturer?
The party who approves the artwork usually carries the cost of any error that was visible on the approved proof. Printers generally treat your sign off as confirmation that content and layout are correct. If a typo, wrong barcode or misplaced logo appears on a proof you approved, a reprint is typically at your expense. Production faults, such as a cut that does not match the dieline or a colour outside the agreed tolerance, usually fall to the manufacturer. Terms vary by supplier, so read the approval clause in your quote.
To protect yourself, approve in writing, name the version, record who checked what and ask your designer to confirm the file matches the supplier's current dieline.
Common Dieline and Artwork Mistakes and What They Cost
Each of these is cheap to fix on screen and expensive to fix after printing.
| Mistake | What Happens | How to Prevent It |
|---|---|---|
| Outdated Dieline | Artwork misaligns with the folds on the finished pack. | Confirm the version and date with the manufacturer. |
| Text Crossing a Fold | Words distort or split. | Keep text inside panels and the safe zone. |
| Missing Bleed | White slivers show at the edges. | Extend the background 3mm past the trim line. |
| Barcode Too Small or on a Fold | Scanners fail at retail. | Give it a flat panel and test it. |
| Fonts Not Outlined | A substitute typeface prints. | Outline the type and export again. |
| Foil Layer Misaligned | Foil lands off the logo. | Build finish layers from the same artwork. |
| Ink on the Glue Flap | The box does not seal. | Mark the flap and keep it clear. |
Packaging Artwork FAQ
What is a dieline in packaging?
A dieline is a flat template showing where packaging is cut, folded and glued. Artwork is built on it so every element lands correctly on the finished pack.
What does print ready artwork mean?
It means the file can go to production without edits. It has the right dieline, bleed, outlined fonts, high resolution images, correct colour setup and labelled finish layers.
How much bleed does packaging need?
Usually 3mm on every side, though some jobs need more. Confirm the figure with your manufacturer before design starts.
What file format do printers need for packaging artwork?
Typically a print PDF such as PDF/X4, with fonts outlined or embedded. Some printers also ask for the native Illustrator or InDesign file.
Who is responsible if packaging prints wrong?
It depends on where the error sits. Mistakes visible on an approved proof usually fall to the brand, while production faults usually fall to the manufacturer.
Can I use an online dieline template?
Only for early planning. For production, use the dieline built for your exact board and structure by your manufacturer.
Prepare Packaging for Production
Elouvé Collective is a luxury branding and packaging design studio working with beauty, skincare and wellness founders.
Get in touch to prepare packaging for production with confidence.
